Everything is ready: you know a bit about weaving, your warp is ready, and the heddles are tied. After all that setup, the weaving will be easy.
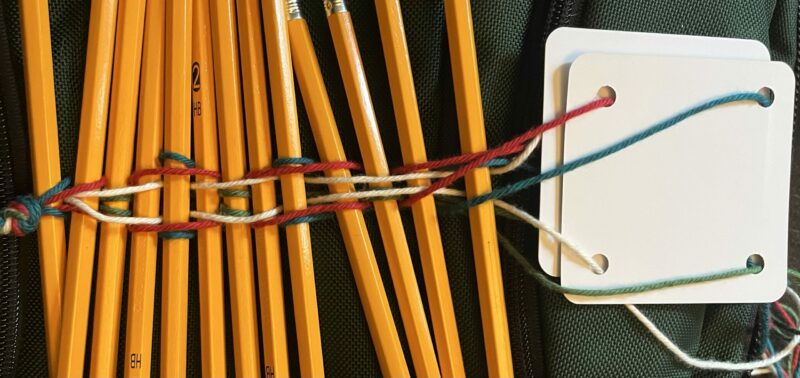
Your loom should look something like this.

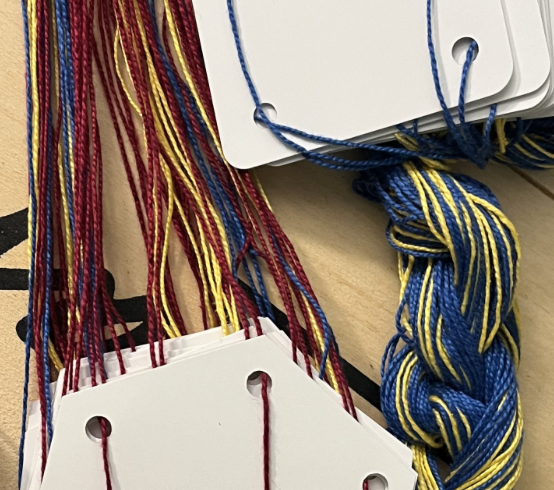
You’ll need a couple more things. First, a shuttle to hold your weft while you weave. Nobody likes a tangled weft. You can purchase all sorts of fancy shuttles, but for this simple project a tube of paper or piece of cardboard is fine. Wrap a few yards of your weft thread around it. I’m using black because it matches the edge threads of the warp. It isn’t necessary but it’s nice to have a beater to press down (beat) the open shed. I’m using a bone folder, but a table knife works fine (dull, no serrations, flat back), or your fingers, or a ruler.
Oh, and a few more pencils.

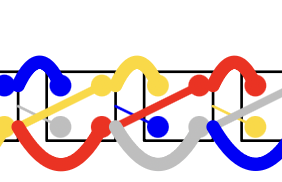
Let’s look at how this is going to work. When you lift the front heddle, the one with the pencil, it pulls up half the warp threads, creating a nice shed. If you make the loops too small, you don’t get a large-enough opening and it’s hard to get the shuttle through.

Now try the back heddle. You should still get a large shed, but see how the warp has to slide past the front heddle? Now you understand why we couldn’t just use two big loops.

The tension in the warp threads is often not quite equal from thread to thread. Using a continuous loop of warp helps with that since tension can equalize better. Still, it’s a good idea to start weaving with large yarn or strips of paper, something soft and much larger than your warp threads, so that the tension differences will be reduced. Pencils aren’t soft but will still work for this.
If you are making a long warp, you still only need to do this step once at the beginning. When you plan the length of the warp threads, make sure to add a few inches that you can waste at the beginning.
Pencils also work very well if you want fringe at the beginning of the finished band – weave with them in, then pull them out at the end.
Lift the front shed, the one with the pencil. Use your beater to tap firmly on the cloth end of the warp – the one closest to you where the weaving will happen. Stick a pencil in.
Let the front shed drop and lift the back shed. Beat with the beater, and insert a pencil.
Repeat until you’ve used four pencils (plus the one holding the end of the warp).

Time to switch to the weft. Lift the front shed, beat, and put the weft through. Leave a tail hanging out that’s at least three times the width of your warp. One pick woven.
Lift the back shed, beat, pass the shuttle through the shed. Put the tail of the weft through the shed from the other direction. This will lock the weft in place so that your band won’t unravel when you take it off the loom.
When you pass the shuttle through the shed, don’t pull it tight. Leave a small loop sticking out on the far side. After you switch sheds, then pull the previous pick of weft tight. This will help keep the edges of your band even.
Lift the front shed. Beat. Pull the previous weft pick tight. Pass the shuttle through the shed.
Lift the back shed. Beat. Pull the previous weft pick tight. Pass the shuttle through the shed.
And so on.
If you get low on weft, pull the last few inches off your shuttle and refill it. Now overlap the old and the new weft threads for a few picks. After you’ve woven past that point, you can trim off any dangling ends.

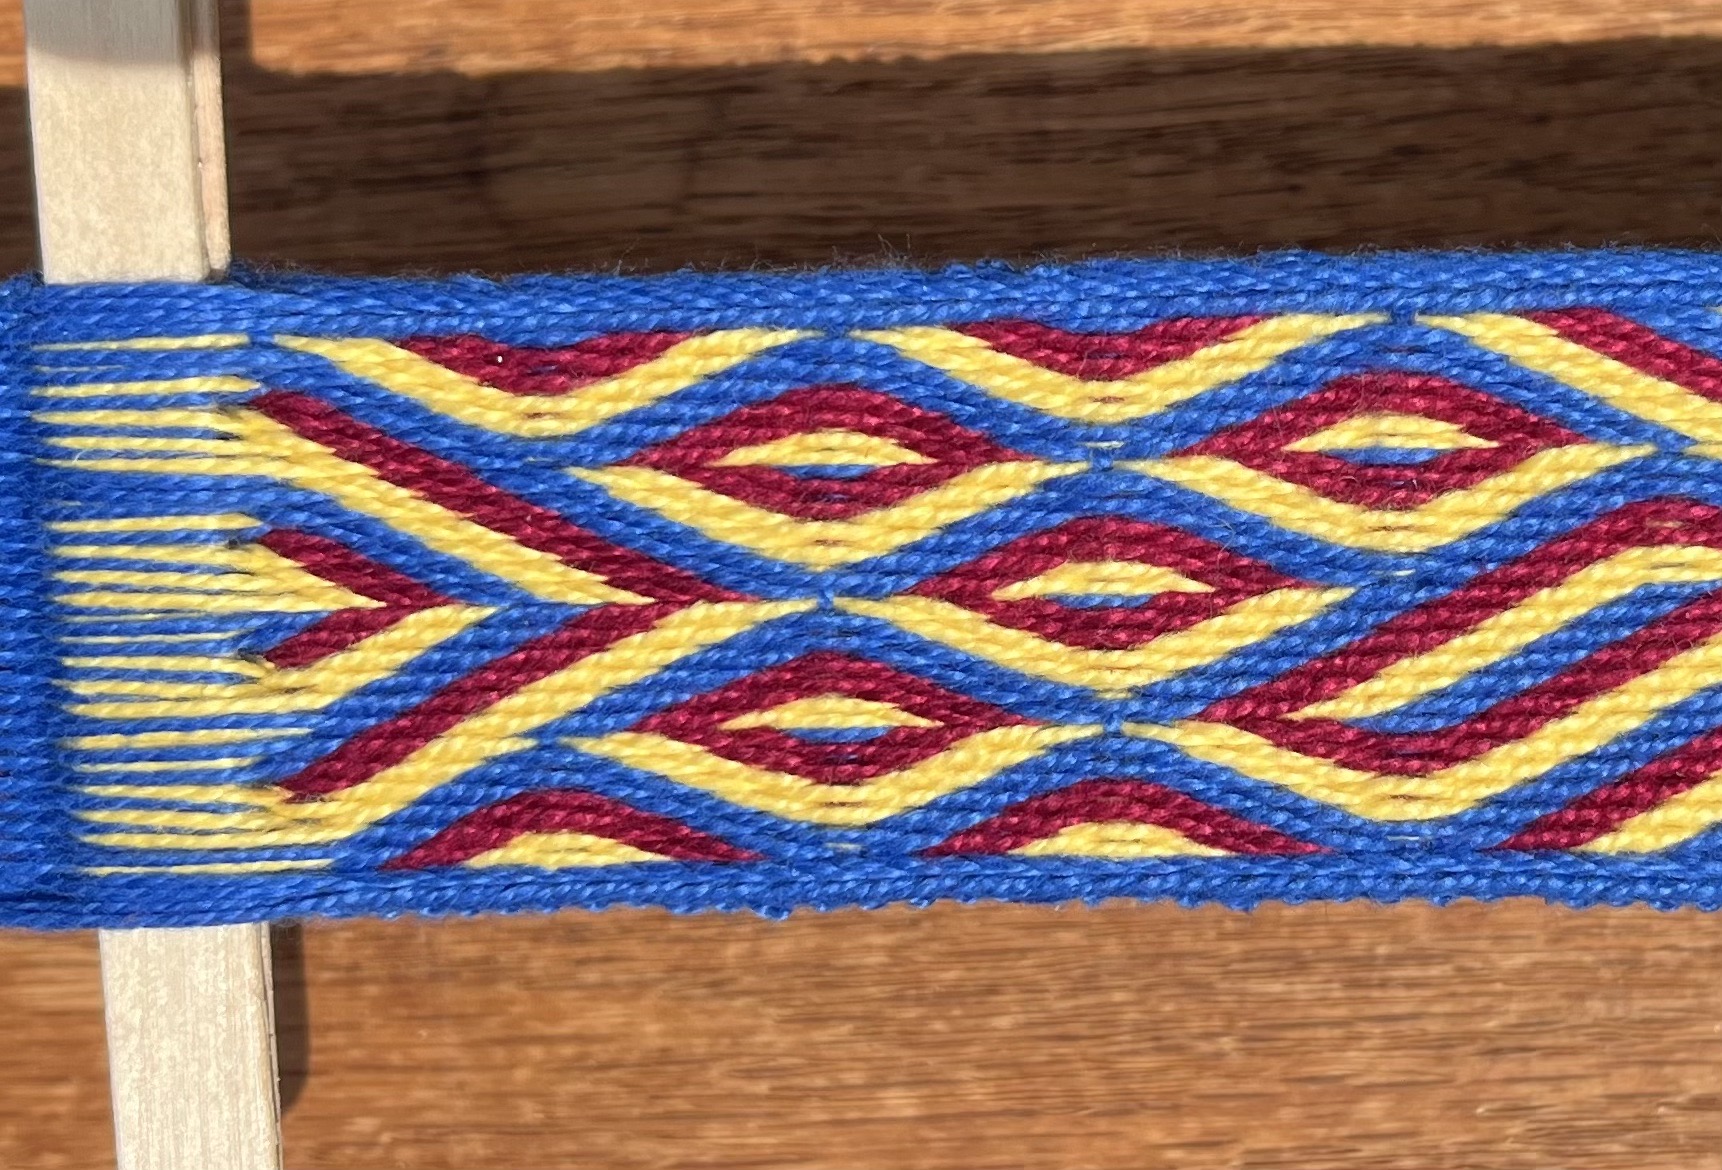
This is a warp-faced band. If you pull the weft tightly, you won’t see any of it except at the edges. All the pattern is created by the stripes in the warp threads. In the photo above I’ve finished the first bookmark, put some pencils in to separate the first one from the next, and started weaving the second bookmark.
But what to do when you reach the end? There are several options. The easiest: just leave some warp loose, and tie it to the weft fringe after you cut the bookmarks apart. You could also use a needle to weave the weft end back into the band to hold it tight. The third, most elegant option requires you to have a couple of needles ready that will take your weft thread. When you get to the last two picks of the band, insert a needle along with the weft and leave it there. These needles go in the same direction as the weft. Weave the last pick, then cut the weft, leaving a few band-widths. Insert it in the eye of the first needle, then use the needle to pull the weft through that penultimate shed. Tighten the weft up neatly, then use the needle in the shed before that to pull the weft through this third-from-the-end pick. That will anchor the weft in place at this end in exactly the same way you anchored it at the starting end.
At this point you can cut off any dangling bits of weft. If you want to make more bookmarks on the same warp, keep weaving. If you’re done with this warp, you can cut the bookmark off, trim the fringe neatly, and go read something good.


2 responses to “Weaving 101: Weaving (finally!)”
First time I had a chance to get to your blog, so now I have to read backwards and find out about this weaving project! I just made it into Ravelry, after thinking it would be months more. Very cool that you are also in State College. Let’s find a time to get together.
Thank you SO much for this! Now that I’ve just picked up the inke loom my dad made for me, I may just work with that, but I WILL “test/use/do” a weaving using this way of winding the warp, then attaching to pencils which are attached to something else, etc. Especially since that’d be great for weaving whilst camping, staying for a time at someone’s house, etc. where I wouldn’t have my loom, plus it’d be fun to have my daughter and I “beating” at the same time – she could make her own bookmark! Plus, it’d be therapeutic for her in an occupational therapy kind of way (very high-functioning autism, would get her thinking about things in several dimensions, and how things work together.)
Thank you AGAIN for the time, effort, clarity, photos, and everything you’ve put into this. I really appreciate it.